Nice tiny Rubicon Models 1/56 scale Kettenkrad. It's so small, I forgot I finished it last month! It's been sitting hidden the bust I've been painting off and on, so I completely forgot about it. This is built (mostly) out of box, with the exception of the molded on mudflaps that I removed and the addition of a tailpipe to the muffler.

Showing posts with label 1/56 Scale. Show all posts
Showing posts with label 1/56 Scale. Show all posts
Wednesday, May 31, 2023


Wednesday, May 17, 2023
Repainted Hungarian AFVs
Recently completed a full repaint of these 1/56 scale resin Zrinyi assault gun and Csaba armoured car from Mad Bob Miniatures. I had a lot of resin seepage on the bottom over the past few years and they really weren't up to my current painting standards. Once stripped, I removed the resin crew and re-did a lot of the detailing - especially rivets - using plasticard.
I opted to paint them in a monochrome Honved green using a 50/50 mix of Tamiya Park Green and Flat Green, with wear done using Vallejo Air Pale Green. These tones were then melded using an overall green oil filter and, once cured, weathering was done using dry-rendered oils and enamel washes. Decals are a mix of Mad Bob and Warlord games. The large balkenkreuz on the Zrinyi's skirts was done with an airbrush stencil.
Stowage is a mix of random bits I had laying around, with ropes made using embroidery floss pulled taut over them and held in place with CA glue. To add rigidity and tone down their glossiness, I applied a several coats of Tamiya Flat Clear with a brush.


Friday, April 7, 2023
1/56 Warlord Games Opel Maultier
I spent March completing a variety of softskin vehicles for 28mm gaming - second up is Warlord Games 1/56 Opel Maultier. With the exception of the extended side view mirror and taillight, this was built out of the box standard. A very basic kit overall, I decided to add several Tamiya 1/48 fuel drums and jerry cans to the truck bed to simulate a logistics vehicle for the SS Wiking Panzer Division.
Overall, this is a nice straightforward kit that's hampered by WG's lack of supplying clear sprues for windshields, which can be a pain for novice modelers.


Sunday, November 21, 2021
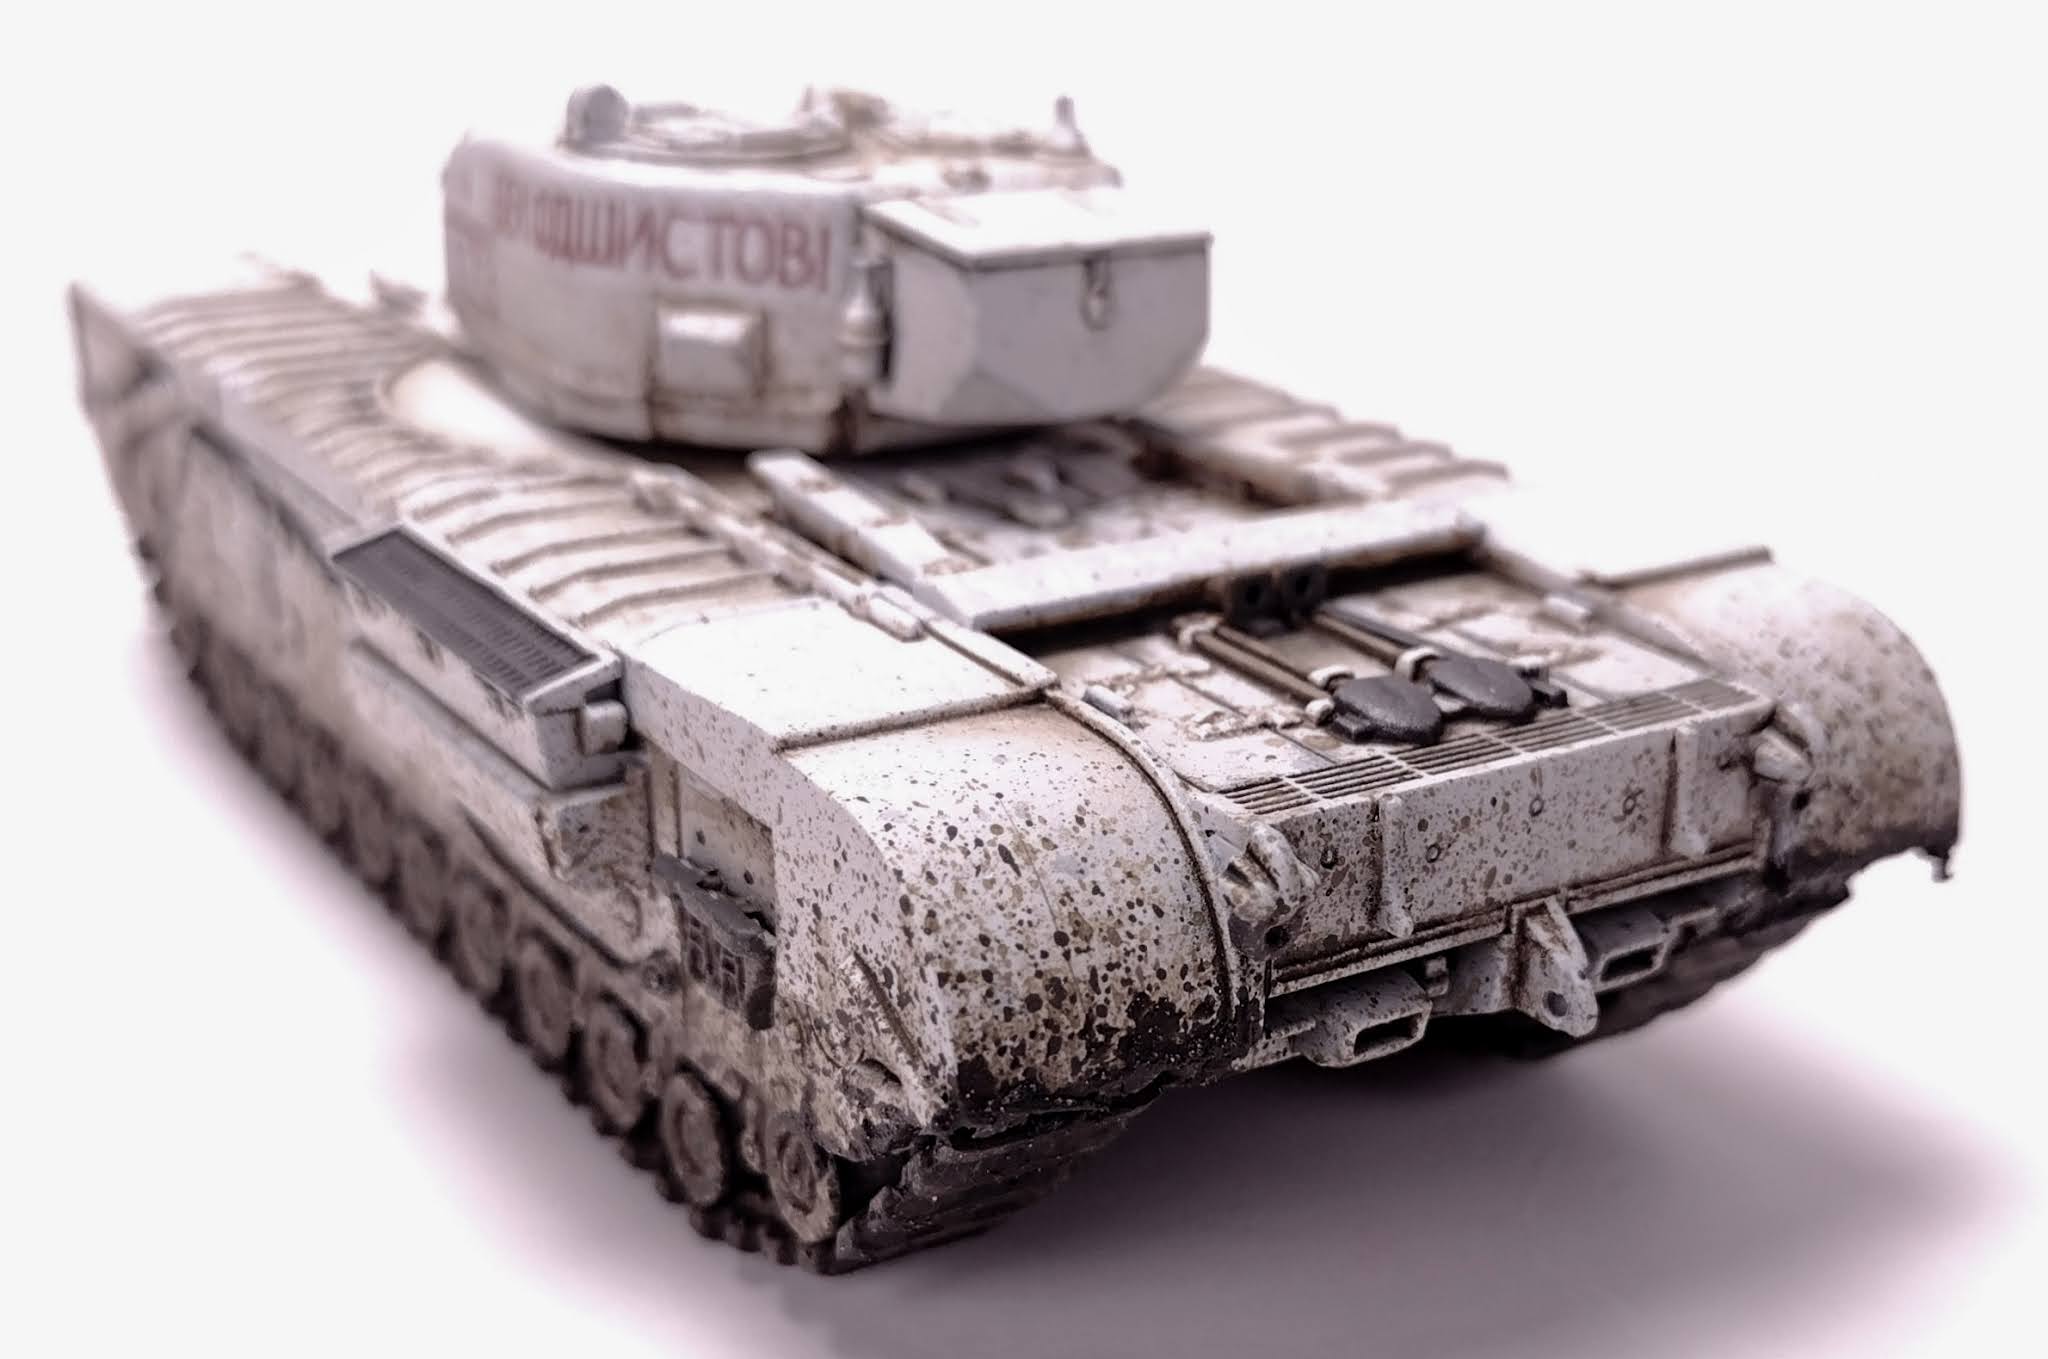
1/56 scale Lend-Lease Churchill
Warlord Games 1/56 scale Churchill tank
This build is basically out of box, with the exception of the turret - I added a weld bead around the bottom edge, as well as cast texture using Tamiya putty. Deciding that I wanted to do a Lend-Lease Soviet version, I also removed the front track guards, but was unable to remove the rear guards (the Soviets did this to prevent thick mud from building up inside the upper track runs).
Like most of my Soviet tanks, I wanted to do a whitewash version but decided against using oils, instead opting for a grey primer with Tamiya flat white overspray. Unfortunately, pure white vehicles like this are difficult to photograph, so you don't see the subtle variations in tone. I then did detail painting in Vallejo acrylics and added custom "over/under" turret numbering and insignia.
I then applied an overall filter of white oil paint and did pin wash and dry-blended weathering using oils. As I wanted a heavy emphasis on muddy conditions, I did a second pin wash and heavy streaking on the lower portion of the hull, then added splatter effects with acrylics and heavy mud with Vallejo environmental effects. Oil and gas spills on the engine deck, as well as muffler rust, was done using AK enamel washes.



Saturday, August 21, 2021
1/56 scale ETO Marder III(r)s
To finish out my backlog of finished projects, here are two Italeri Official Account / Warlord Games 1/56 scale Marder III(r). As I mentioned in my last post, these are very nice kits and the multi-part crew are a nice addition, since this allows part swaps with Warlord's other 28mm German infantry and tank figures.
I wanted to take a different approach to painting the crewmen, so I primed them in medium grey and then overcoated that with GW's Athonian Camoshade acrylic wash. This provides a quick and easy field grey uniform with shading and allowed more time to focus on skintones and faux glass lens effects.
These were primed using Krylon Red Oxide primer, then basecoated with a 75/25% mix of Tamiya Dark Yellow/Yellow Green, with soft edge camo in Tamiya Red Brown and Medium Green. Detail painting was done with Vallejo acrylics and some craft paint. Decals are all Italeri/Warlord brand. An overall yellow oil filter was applied, then oil pin washes added to accentuate details, and some dryblended oils to simulate caked dirt (mostly in the crew compartment) and rusty exhaust were added. Mud spatter effects were done in acrylics.


Friday, August 20, 2021
1/56 scale Afrika Korps Marder III
This is an Italeri / Warlord Games 1/56 scale Marder III(r) in Afrika Korps colors. This is a pretty nice kit that has a lot of nicely molded detail, as well as a good selection of three multi-part crew. My one big complaint is the tarp/netting poles are INCREDIBLY fragile, both of these broke simply by my handling during painting (one disappearing into my carpet) - not a great feature on a model meant to be handled for gaming.
As this model goes in my Afrika Korps force for Bolt Action, I switched out the plastic crew for 28mm metal crew from Perry Miniatures.
Basecoat is Testors Panzer Grey, then overcoated with Tamiya acrylics, with detail painted in Vallejo acrylics. Decals are from the kit - though I did make the earlier SP AT tactical symbol from a combination of two different decals. An overall oil filter was applied, then oil pin washes to accentuate detail.
(Continued apologies for the picture quality. I'm still experimenting with the new camera which takes the lighting setup I had before VERY differently than the last camera. If you notice something odd, please let me know.)


Thursday, August 19, 2021
1/56 scale Panzerkampfwagen B1/B2 740(f)
Here is Italeri Official Account / Warlord Games 1/56 scale Char in German service, otherwise known as the Panzerkampfwagen B1/B2 740(f). Overall, this was a fairly good kit with a lot of options. My only issues were that it seems a little undersized and the large rear fuel tank had fit issues and needed filling and sanding. This is almost entirely out of box, except for the folded tarp and oversized chain (not a great idea to put a lot of external stowage on a flame-throwing AFV!).
It's painted using Tamiya acrylics for the vehicle paint and Vallejo acrylics for any details, then an oil filter was applied overall, followed by a pin wash. Areas of heavy dirt, soot, and the rusty exhaust were done by dry blending oils (as well as an enamel wash for the exhaust). Mud splatter and streaked grime are all acrylics.


Thursday, April 1, 2021
1/56 scale Warlord FlakHetzer
I'm still trying to adapt to my new lighting setup, so here's the first test photos featuring the completed Italeri/Warlord 1/56 scale Hetzer mit 2cm flak. Not having much material to go on, I opted for a hard-edged three color camouflage scheme. Unlike many of my previous builds, all the chipping is done with a brush. I wanted the flak gun to look like it had just rolled off the assembly line to be thrown inside the chassis with no painting at the factory, so I painted it a red oxide primer color. The netting is medical gauze, unrolled and lightly misted with green spray paint, before being wetted down with PVA glue and water.


Saturday, February 6, 2021
Italeri 1/56 "Last Stand" King Tiger

So, I acquired this Italeri King Tiger as a tournament prize ages ago, promptly built it.....and then it sat in my paint queue for over a year. To be honest, I wasn't really sure what direction to go with this, as I already had a resin "Henschel" King Tiger in my inventory, which is big and terrifying, and two seemed like overkill. This is also slightly undersized for the scale (the Panther I posted yesterday is actually slightly taller and beefier in general), the details aren't really correct in some places, and the molded-on zimmerit is.......lacking, or entirely absent in certain areas where it should be (the mantlet and turret rear stand out). I scribed some quick (and not very good) zimmerit lines and then sanded and cut into many areas of the zimmerit to make it appear that the paste was flaking off.

Finally, I decided to hell with it and threw together this "last stand" King Tiger. Since the model itself is a little anachronistic, I made the backstory that this was pulled from a depot somewhere in the final days of the Third Reich and given a quick painting of insignia. As usual, I primed in red oxide, put down a coat of hairspray for chipping, and then airbrushing Tamiya 50/50 Yellow-Green and Dark Yellow. I then did the chipping in the non-coated areas and, to simulate wear on the zimmerit, lined the edges and areas of heavy use by using the basecoat color with some white mixed in. As I mentioned, I wanted this to look like someone had handpainted on the insignia with a brush, so that's what I did - no decals here! I added streaks and rings on the upper hull to simulate where a paintcan was laid.

After finishing detail and track painting, I sealed the model and then gave it an overall dark brown oil filter. Normally, I use a yellow/light umber filter on dunkelgelb vehicles, but I really want this to look dirty, so it is noticeably darker than most of my German AFVs. Once dry, I then added successive darker washes to the zimmerit towards the bottom to simulate dirt and mud buildup in the crevices, as well as dry blending light umber and brown oils in the deck surfaces. I washed the tracks with AK Track Wash, hit the lower hull and track areas with Vallejo European Mud, and then loaded an old toothbrush with Vallejo European Splash Mud, Vallejo Medium Olive, and Secret Weapon Caked Dirt and flicked it to create the splatter effect. Rusty mufflers were done using Vallejo Rust Texture, overpainted with successive oil filters of red, orange, and finally yellow - this creates an oxidized texture without the use of dry pigments. Finally, I painted all the viewports and the headlight and gave them a gloss coat.

In closing, is this entirely historically accurate! Definitely not! But it was something fun and a good base to test out some new techniques.
Friday, February 5, 2021
1/56 Panther repaint

I'm back with some new (old) models, this time a repaint of the Italeri 1/56 scale Panther with anti-air armor I completed several years ago. I was never really happy with the paintjob and weathering I did and decided to give it a new lease on life.

I didn't want to go to all the work of stripping the entire thing down to primer, so I decided to simply overpaint everything. I started by adding chipping around worn edges, repainting the tools, and adding a little more depth to the tank commander figure using acrylics. Once that was done and sealed, I started by giving the tracks an overall wash using AK enamel track wash, and then picked out worn metallic parts with pencil lead. I started on the oil weathering by applying a white filter over the entire model and, once that had dried, doing a much deeper wash of white oil paint. This left the whitewash with a semi-transparent layer overall to represent a weathered finish but, wanting to keep the whitewash heavier in areas that had less wear and exposure to the elements, I began dry blending white oil paint into crevices. You can see a good example of this on the glacis plate under the MG mount and near the track covers.

I then applied a detail wash of brown, green, and black oils (the colors shift darker lower on the hull to represent mud and heavier weathering kicked up by travel). As rusty as the previous weathering had been, I wanted a darker tone to the armor panels and mufflers so applied an overall wash of dark umber and then applied multiple filters of red, orange, and finally yellow oils. With the pigment load getting higher and higher, this creates the "dusty" oxidized effect without having to use dry pigments.

Finally came mud. For this I used Vallejo European Mud, focusing on the track areas, rear hull, and lower glacis. Once dry, I loaded on old toothbrush with paint and "flicked" it over the lower hull to create splash effects, using Vallejo European Splash Mud, Vallejo Dark Olive, and Secret Weapon Caked Dirt.


Subscribe to:
Posts (Atom)