Showing posts with label WIP. Show all posts

Friday, September 15, 2017

Ork Shanty Town WIP

I'll start off with my usual "sorry for the lack of updates, guys" schtick. However, I have actually been working on a new terrain project! So I'm kind of vindicated in leaving the blog to languish for a few weeks while I do some work. I will say that I do post much more on the Facebook page as of late, so if you're on Facebook and you don't mind me coming up on your feed with random updates and shares, hop on over and Like the page.

With Chicago Bolt Action being set with about 3-4 tables worth of my terrain for events like Operation Sting and Adepticon, as well as just finishing a table for Frostgrave, I thought it was time to revisit the old Necromunda/40K terrain bundle for Adepticon and other local events. With that in mind, and after having played through Borderlands once again, I decided to take a crack at some non-Imperial terrain - an Ork Shanty Town. Much like my previous human shanty town (which is currently on loan to the guys over at Hyacinth Games, makers of Wreck-Age), these are based on old CDs, with walls of poster foamboard, covered in cereal cardboard with riveting added to the edges. The roofs are all corrugated cardboard (all of a corrugation is the smallest available - known as "E-type" - to fit appropriately into the 28mm scale). I'm adding gubbinz, old bitz, and parts from old toys as detailing. Each shanty is sized a little differently - some are large for Nobs, others for Boyz, and the smallest for Grotz.

Most of the unique details are finished for each of the shanties and I'm currently moving on to molding and casting repeated detail parts like Ork glyphs, windows, doors, etc. before finishing up the basework in preparation for primer and paint. Enjoy!


A group shot

Tuesday, September 27, 2016

Normandie Terrain: Laser Cutters Are For Wusses

A really quick WIP post today since my family has been sick for about a week now and I'm still not 100%. Work continues on the Normandie terrain, specifically the other buildings. So far, I've finished building the stable and greenhouse (in the bottom pic) as outbuildings for the farmhouse and chateau (respectively).

I'm currently working on roof shingles for the petrol station (in the right background of each pic) and the schoolhouse (left background in the bottom pic). Besides the greenhouse (which was built using a clear acetate frame with basswood glued unto it), all of these were built using 3mm MDF cut using a table saw and dremel.


Friday, February 19, 2016

Death on the Danube: WIP Hungarian Infantry (& Germans!)

After much too much procrastination, I'm finally ready to paint my Hungarian infantry. I made a couple of last minute purchases to add to the army, notably Brigade Games WW1 Austrians for use as Hungarian Border Guards, Warlord Games Last Levy Volksturmm for use as University Assault Battalion, and Brigade Games Gebirgsjager of which one squad will do double duty as Hungarian Mountain Troops and the rest will be used for my planned Winter German army.


University Assault Battalion (Warlord Last Levy) with Hungarian officer "advisor" (Great Escape SS Officer)

Hungarian Border Guards (Brigade Games WW1 Austrians - LMG gunner converted from riflemen. He is armed with the 1920's-era Madsen MG. The Madsen was the main Honved infantry LMG until 1938, when the Solothurn LMG was equipped. It remained in rear-echelon use and was re-issued for general use in 1943)

Regular Honved Infantry (Great War WW1 Late War Germans, Panzerfaust-armed figures are Great Escape SS Panzerjager team. I had to GS the jackboots on these figures. Unfortunately, since my sculpting is poor, they look a little too big. Almost like wellies.)

HQ Units - (front to back) Medic & Gendarme "assistant"(with MP-35), Major and ADC (with MP-35), FAO, 1st Lt. (with Danuvia 39M) & assistants (with MP-38)

Support Units - (front to back) Pancelrem (Hungarian-produced 60mm Panzerschrek) team, Sniper team, Flamethrower team, Light mortar team, Heavy MG team

Gebirgsjager/Hungarian Mountain Troops (the first two rows of infantry are the proxy Hungarians. Medic, MG34 team, and Luftwaffe Spotter will only be used in my future Winter German army)

Saturday, November 21, 2015

Death On The Danube - WIP Hungarian Infantry & AFVs

It's nice to finally start on my WW2 Hungarians. I've been fascinated with the Hungarian participation on the side of the Axis since reading an in-depth history of the German/Hungarian defeat on the Don River. Before then, I'd never known much about this "minor" Axis nation during WW2. It's not taught in school unless you take a really, critical history course and it's not widely known. Which is odd considering just how involved the Hungarian army was on the Eastern Front and how tragically that became.

After reading Krisztin Ungvry's amazing book Battle For Budapest: 100 Days In World War 2, I just knew I had to try modeling this crucial battle in miniature. As such, this force is meant to represent the odd assortment of units trapped inside the Budapest cauldron during the winter of 1944-45. Unfortunately, Warlord's Hungarian army list for Bolt Action is riddled with inaccuracies and missing units; so this build will show many units that aren't available under the generic Hungarian list. As such, for casual play, I will be utilizing the German Last Levy army list and switching back to the generic Hungarian army list for tournament play.

For Hungarian-made AFVs, I'm using Mad Bob Miniatures Csaba armoured car and Zrinyi assault gun (with crew from JTFM's German Tank Crew - I cut the bill off their soft caps to more accurately represent the high-peaked soft cap of most AFV crewmen). These are fairly nice models but, to me, there are some inaccuracies I had to correct. Also, the casts had an odd rough texture to them, especially after washing, so I strongly recommend smoothing this out with a Dremel polishing tool bit before assembly (there is one portion on the Csaba I missed and it's really rough).  On the Csaba I added tow hooks from 20g copper wire, a new AT rifle barrel from copper rod, a corrected cylindrical MG barrel from plasticard, and stowed mallet/shovel on the left side of the hull. On the Zrinyi I added tow hooks from 20g copper wire and a tow chain from jewelry chain. With plasticard, I added the missing headlamps, driver's periscope, and new schurzen attachment points. And, yes....I did drill out each and every hole on the mesh schurzen! Not for the easily annoyed.


28mm Hungarian infantry models are the major sticking point of this army - NO ONE MAKES THEM. It's odd that you can find miniatures for units from even smaller nations, but not Hungary. Many people recommend using the Early War era Germans. While this will do in a pinch, for me there are issues - Honved infantry weren't generally issued with the common Y-strapping and 1938 model Stahlhelm of German troops (though they did start receiving stocks of weapons and equipment after Hitler removed Admiral Horthy from power and rushed German units into Hungary).

Instead, I chose to use Great War Miniatures' WW1 Late War Germans. While they do require work (smoothing puttees and sculpting boots, removing cuffs on jackets, removing water bottles, etc.), the range provides a variety of poses and the majority have the large, distinctive 1916 model Stahlhelm. I'm also interspersing Rules of Engagement's Germans in winter gear for a little variety and also to make certain models stand out on the tabletop (NCOs and Panzerfaust-armed infantry, in particular).

Below is a WIP pic of the majority of my infantry so far. My officers are armed with a mix of pistols and MP-35 SMGs converted from WW1-era Bergmans (...if you've ever seen Indiana Jones and the Last Crusade, these are the gun used during the Venice boat chase). The regular Honved troops are pretty straightforward with some headswaps from West Wind's SOTR Bare German Heads set. The NCOs are armed with MP40s from Reaper Miniatures' 20th Century Weapons set. Panzerfaust-armed figures are from ROE's German Panzerfaust blister. The LMG gunners are equipped with German-supplied MG42s (again from Reaper).

The MMG team is armed with the Hungarian Schwarloze M07/12. This machine-gun was an updated WW1-era model very common in the Hungarian army of WW2. My favorite unit so far is the 10cm Skoda Houfnize 14/19 medium artillery gun. I heavily converted this from a Warlord Italian Modelo 14 with GWM German Artillery crew. I elongated the barrel with metal and plasticard tubing, filed down the gun shield (adding a hinged top plate, gun sight aperture, and sliding aperture plate), added gun shield seats from plasticard and 20g copper wire, removed the limber rails, and added a recoil spade from plasticard.


That's it for now! Only a couple more figures to convert above, then on to the mountain troops....

Friday, November 20, 2015

Italians @ Malta, 1942: WIP M14, Light AT Gun & Medic

After Operation Sting this fall, I recognized the need for some additional units - a Medic, an AT Gun, and a medium tank. I happened to win a Soviet 45mm AT Gun and decided to convert it (back) into a German 3.7cm Pak36 (of which the Soviet gun was an almost exact copy of) for my Airborne. I removed the muzzle brake, sanded down the spoked wheels into disc wheels, and slightly rearranged the elevation controls. I then added prone Airborne figures from the Warlord Light Mortar team blister and a small ammo crate made out of plasticard. The base is cut by hand from 2.5mm plasticard sheet.

The Medic is also from the Warlord Light Mortar blister. He originally carried a carbine in both hands which I cut and sanded out and replaced with a spare left hand and a revolver hand from Reaper's 20th Century Weapons set. The revolver is a nice touch, since many non-combat units were issued the WW1-vintage Bodeo M1889 as a sidearm.

The M14/42 is a Blitzkrieg M13/40. I had actually intended to order the ugly, multi-turreted M11/39 but messed up the order! In any case, it's a cool little AFV. I added handholds and tow hooks from 20g copper wire, a shovel & hatch locks from plasticard, a pintle-mounted Breda (converted from a Reaper BAR, again from the 20th Century Weapons set), and Tamiya 1/48 jerry cans.


Friday, March 6, 2015

Italians @ Malta, 1942 - Defensive Walls & Objectives

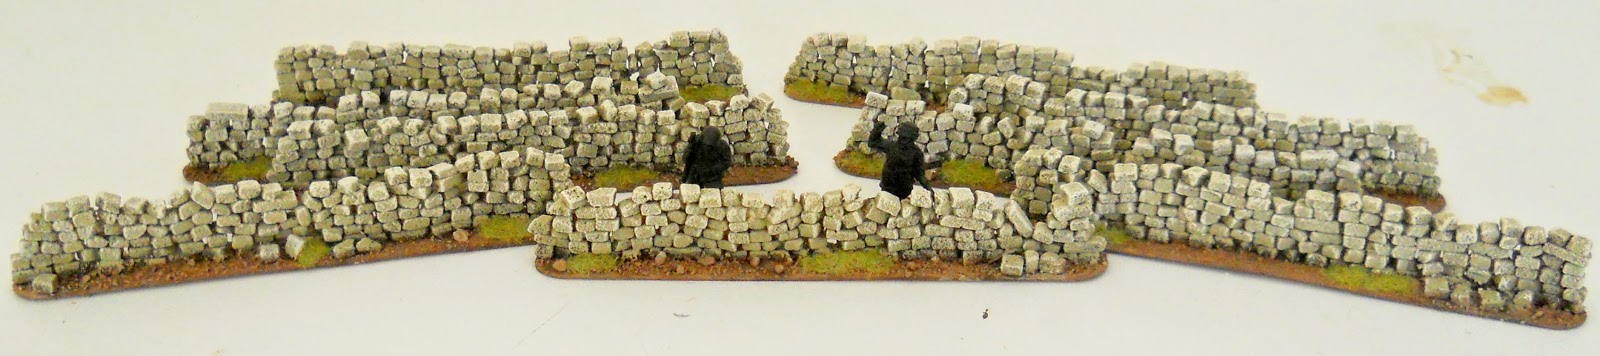
Bolt Action requires that the Italian player relies primarily upon defensive positional tactics, as such it requires an Italian army to re-roll Attacker/Defender rolls and, if defending, to roll for D3 defensive positions. Each position should consist of three 6" wide by 1" tall linear obstacles. 

Initially, I had considered sculpting straight linear sandbag walls out of Sculpey but it would had required considerable time to sculpt and dry, so I ruled that out. Instead, I felt stone walls were a better - and more thematic - option. The rural areas of Malta are divided up into small farm fields separated by dry stone walls and this centuries-old practice actually was a large deterrent to the planned modern airlanding operations.


I was lucky enough to remember a local Hobby Lobby had a small "stone" mosaic tile kit on clearance a few months back but I didn't have a use for it at the time. Luckily, when I returned this past weekend, not only did they still have it for sale; it had been reduced further to $1.93! The kit came with small ~5mm square faux stone tiles, some glue, and a grout mix. I based my walls on tongue depressors, laying down each course with white glue and allowing it to dry. It was so easy, my 3 year old son even helped with much of the construction!


The tiles were all different colors which looked good in the kit, but fully assembled, looked a little too much like I had glued down Chiclets candy. So I sprayed them with black primer and drybrushed successive coats of brown, biege, grey, and finally white. I also used this opportunity to experiment with soil color for the bases. Malta has very a distinctive red-brown soil (which you can see in the pictures above) that is difficult to replicate in miniature. I felt the wall bases were a little too dark.


I completed painting of the objectives yesterday as well (except for the Lanciafiamme, which will be airbrushed). I'm really happy with the shrine. I also added a parachute from a tissue soaked in PVA and some strapping from nylon string. I again used this as an opportunity to experiment with the soil color, which is lighter but I think needs a brown wash to tone down contrasts. 


Monday, March 2, 2015

Operation Herkules - Italians @ Malta 1942

For this year's Adepticon, I decided to start playing Bolt Action. It's a game I've been meaning to get into for a few years now but just never had the time or inclination to choose a national force. This past autumn I finished reading an excellent book about the Siege of Malta during World War 2 and the aborted joint Italian/German invasion of the island. Siege: Malta 1940-1943 focused mainly on the naval operations  mounted from Malta to harass the Afrika Korps naval convoys and the mass bombing campaign to force the island into capitulation. 

This got me thinking though - what if the planned invasion of Malta, known as Operazione C3: Malta and colloquially as Operation Herkules, had actually happened? In reality, by the winter of 1941-42, continued Luftwaffe bombing and the loss of several Allied naval relief convoys had brought the island to the breaking point. What if Hitler could have finally been convinced that the taking of Malta would have relieved pressure on Rommel's supply lines? What if Generalmajor Kurt Student, planner of the successful yet costly invasion of Crete, was given a second chance to carry out plans for the airborne invasion of Malta? And finally, what if the normally cautious leaders of the Regia Marina, in contrast to their concept of "a fleet in being", mounted a full-scale offensive amphibious invasion of the island?

In keeping with the pulpy nature of Bolt Action, I'm assembling my Italians for a tabletop invasion of Malta in early 1942. I'm trying to stay as close to the realistic plans and unit assignments for Operation Herkules. As such, I'm using a core of Italian Folgore Airborne and amphibious support units from the MVSN Gruppo Battaglione Da Sbarco. Eventually, I'll add a unit of San Marco Marines, German Fallschirmjager, and captured Russian AFVs from 2.PzAbt.zbV66. Below are Warlord Bolt Action Italian Airborne:


The commander figure below arrived missing an arm. Never giving in and never giving up, I sculpted on a cast and sling! This guy is leading from the front.


Here's everything I'm using for the Bolt Action tournament below. The back row are BTD Italians that will be painted up as the Blackshirt Sbarco Battaglione.


The objectives I'm using are a Fallschirmjager drop canister with road signs, a small Catholic shrine to the Virgin Mary, and a L3 Lanciafiamme. The shrine takes its inspiration from the real-life Blue Grotto shrine on Malta.


The L3 Lanciafiamme objective is removable. I had originally intended to use this in-game as AFV support, but the TO isn't allowing vehicle flamethrowers, so there goes that! I came across the interesting "compact" Lanciafiamme which mounted a smaller fuel tank above the rear engine deck. These modifications were made to ten L3/35s in an attempt to save weight and space and to make the AFV completely air-deployable. It was intended to be slung beneath the fuselage of a Savoia-Marchetti SM.82 bomber, which would slow to near stall speeds and low altitude and then summarily dropped with little more than a small parachute to slow its speed still further! I can't tell if the Italians ever actually tested out the idea but it's a cool story, very cinematic!


This model started as a Company B CV33. While the basic shape is fine, many details were poorly cast or misshapen. As such, I removed nearly all surface detail from the body and built it from the ground up - rivets and all. The most technically-challenging parts were trying to figure out how to model the distinctive flamethrower nozzle and the fuel hose. The nozzle I made by using a copper tube, crimped on one edge; while the hose is simply a solder wire wrapped in thin gauge copper wire.


Thursday, September 18, 2014

15mm Lumber Camp WIP #2

A follow-up to my previous WIP post on the 15mm Lumber Camp terrain set. From the left, it's a small bunkhouse, the mill, and a maintenance shed. Not pictured (because they were half finished at the time) are the log and lumber pile linear obstacles. All that's left is a quick ink weathering of the exterior wood surfaces, some spot painting (mostly the tin roofs and bases), and flocking. 


Also, here's a sneak peek of two underscale HO factories I'll be working on once the lumber camp is complete.


Thursday, September 11, 2014

Thursday, July 10, 2014

Canyon Diablo: WIP Dance Hall & Livery Stable

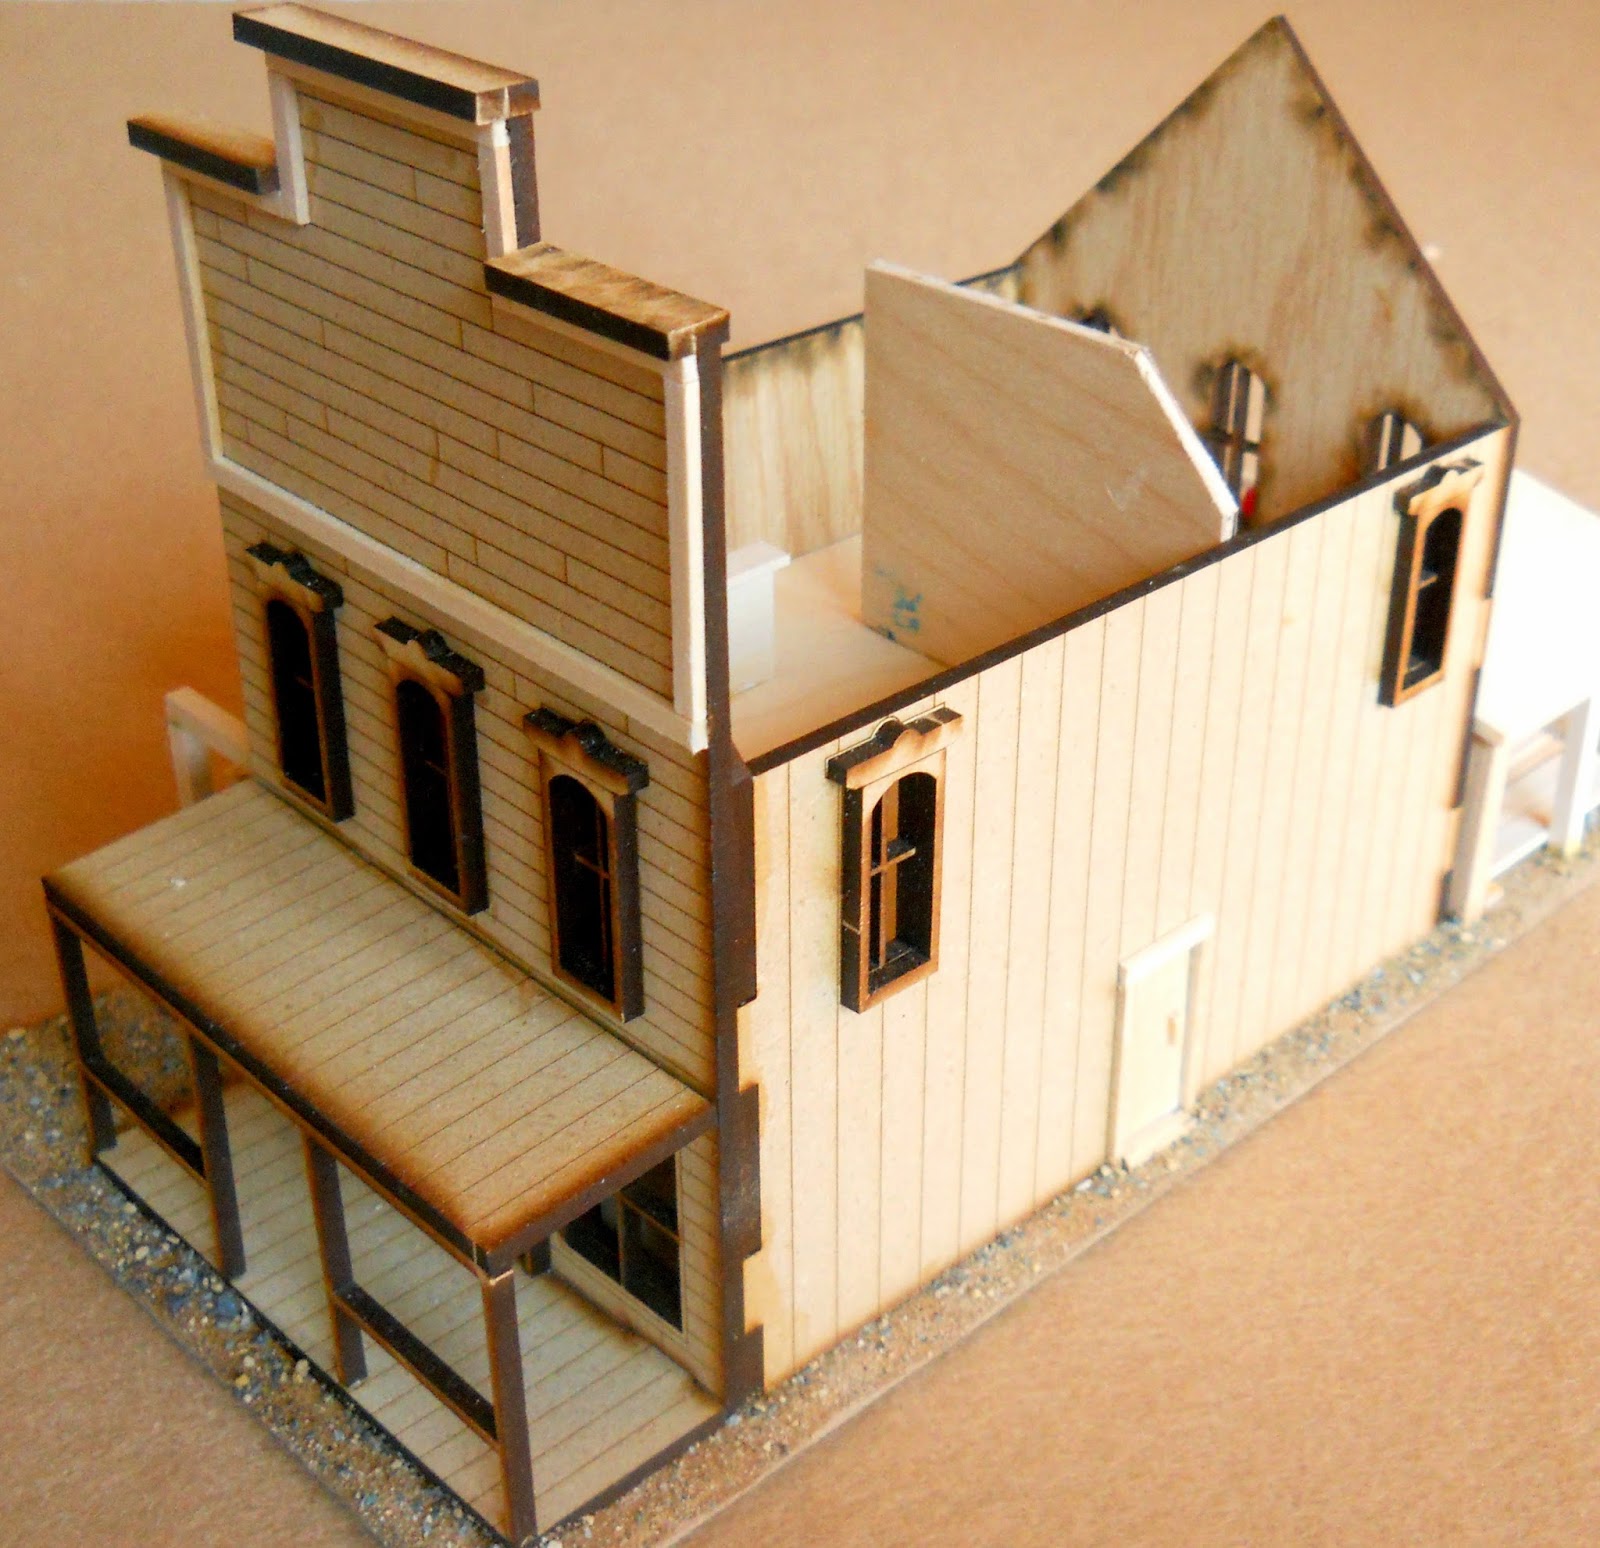
Work continues on the buildings of Canyon Diablo, slowly but surely.  First up this week is the Dance Hall (described in the contemporary literature as "little more than houses of ill repute"), as such I started adding a large moonshine still to the rear of the building. Don't be alarmed by the bright red fire hydrant look, the shape will be half hidden by dried earth along the bottom half (shown sometimes on old stills to contain heat), piping will be added, and the entire thing will be painted an aged copper color. The fence framing has been added and I'll be adding the boards after painting the groundcover.


Upstairs I added an interior wall to break up the monotony of the second floor. Unlike previous buildings, I'll put the multiple beds after painting and adding rugs. I also added some framing timbers around the false front and finished the front door. Downstairs, I added a small stage.


The livery stable is intentionally small, as it primarily serves as the coach stop on the North-South wagon trail with the stable for traveler's horses being somewhat an afterthought. The front window is actually made from the leftover Gamecraft doors that were underscale - I cut off the arch at the top and flipped them upside down, then glued three side-by-side, framing the exterior trim. It's hard to see in these photos but the exterior of the building is a wood board-and-batten pattern that I picked up ages ago and has been languishing in my bitz box.