Showing posts with label Adepticon. Show all posts

Saturday, September 22, 2018

Adepticon 2019 Necromunda Update & DeviantArt Gallery


It's Fall and that means Adepticon event submission! Necromunda will, of course, be returning. However, due to the vagaries of Gmail spam folders and a busy September for my family/work, I'm just now getting around to talking with the team and getting all the events submitted.
As it currently stands, we have two tournaments scheduled:
Necromunda by Night - Thursday 5:30-11 PM
Necromunda by Night - Friday 5:30-11 PM
We are looking to add at least one more event/tournament differing from the "By Night" format in some way or another. Unlike last year, which saw the tiles and 3D tables separated by event type, we largely found that format unnecessary, so we will likely combine both formats.
Additionally, we are starting to look for sponsors who are willing to provide some prize support. We had an excellent group of companies who provided a wide range of products last year, and we're hoping to get the same or better engagement this year. If you would like to contribute, please feel free to DM me on Facebook or to contact me via email at ancientsociety79@gmail.com
As for the event team, Duane will once again be joining me. Longtime event player Jason will also be joining our team and I thank him for his continuing support. Unfortunately, Dan has moved on to organizing his own event - GW's upcoming Speed Freaks - and I thank him and wish him the best.

I am always looking for help, advice, terrain loans, and team members, so if you're interested in helping, please feel free to DM me on Facebook or email me.

--------------------------------

Additionally, if you're on DeviantArt, I've started a profile there as well. I know some people don't enjoy Facebook, so this will be a good way to keep up with my work. Every time a new project is completed, I'll post up a glamour shot and link back to here in the description.

https://www.deviantart.com/empireofghosts


.
.
.
.
.
.
.


Friday, March 16, 2018

Tutorial: Information/Propaganda Kiosks

A unique and visually-appealing piece of scatter terrain is an information or propaganda kiosk. These were common in European cities in the late 19th and early 20th century, being covered in advertisements, news, and propaganda posters, and sometimes housed telephones or informative guides. They ran the gamut in terms of shape and size from squares, hexagons, or cylinders; from the size of a single person to large structures that were buildings in their own right. 


Kiosks are quick and easy to make, provide a nice piece of LOS-blocking hard cover, and can be customized for use in games as diverse as historicals, moderns, post-apocalypse, or grimdark 40K/Necromunda. In trying to get terrain finished for Adepticon, for this tutorial I'll be making four for the latter.

Materials
  • Wood dowel/PVC piping (I'm using 1 3/4" wood dowel cut @ ~2" tall)
  • Metal washers (2 per kiosk, slightly larger than the dowel/pipe. I'm using 2" washers)
  • Plastic bases (2 per kiosk, one about the same size as the washers and another smaller diameter. I'm using 40mm rounded lip and small flying bases)
  • Cereal cardboard, cut into strips
  • Plasticard rod (for rivets. Not really necessary unless you want a gothic-industrial look)
  • Bitz 
  • Super glue
  • X-acto knife
  • Sandpaper
  • Paint
  • Advertising/Propaganda posters (sized appropriately for scale, do some internet searches and simply resize your printer output)

1. Cut the pipe or dowel to whatever size you want. I prefer somewhere between 1.5-2" tall to provide cover from elevated positions and for enough surface space to place lots of posters. You want to cut these pieces out at perfect 90 degree angles, so use a miter box or table saw. Rough up the metal washer with a piece of sandpaper for between adhesion and glue the dowel to the washer, looking at it from the top down to make sure it's centered correctly.


2. Repeat the process with the other washer at the top of the dowel, being sure to rough up both sides of the washer, since you'll be gluing bases to the top of it. Again, do you best to center the dowel properly.

3. Glue the larger base to the top of the washer to build up the "roof".


4. Glue the smaller base to the top of the large base (small flying bases fit almost perfectly inside a 40mm base, with just a little sanding around the outside of the flying base)


5. Glue the cereal cardboard strips around the top and bottom of the dowel. To get a proper fit, glue one end of the strip down, pull the strip around so it covers the glued end, then use a sharp X-acto to make a cut just before the glued end, and then proceed to glue the rest down.

For decoration, I used the winged skulls from the Cities of Death kits for the roof and plasticard rod in slices for rivets. You can you whatever bitz you'd like. Obviously, I'm going for a design suitable for the grimdark universe of 40K but you can easily change the design up to fit any period. Most historical examples before WW2 incorporate faux gothic or, more commonly, Art Deco features.

6. Prime and paint. Once dry, seal with flat clear varnish and then cut and apply the posters. It's up to you how you apply the posters, though I use white glue. If you'd like a more weathered look, you can "age" the posters by washing them with diluted black tea.


Wednesday, March 14, 2018

Tutorial: Quick and Easy Bronze Statues

It's Adepticon crunch time and that means repainting old terrain - one of which is this Deathwatch Marine I made years ago from an Inquisitor-scale Artemis and a plinth from an old Tamiya figure. I've done a lot of bronze statues over the years and people keep asking me about my methods so, along with the repaint comes a tutorial. I'll start out by saying that this statue is going to get the works, including heavy weathering. You can skip certain steps to make the statue look newer or less oxidized and I've denoted these steps by placing an asterisk before the number.

Materials needed:

  • A statue (if this is your first time, I recommend a scrap mini. If it turns out great, you've got a statue. If it doesn't, you didn't waste a great mini!)
  • A plinth (this is the stone or cement base the statue sits on. It can be anything from wood to plastic to old bitz. It should just look reasonably big enough to anchor your statue)
  • Black primer
  • 2 shades of Bronze paints (I use Tin Bitz for my dark base and Vallejo Bronze for my highlight)
  • Verdigris paint (I mix my own using mid-tones of green, blue and white but there are ready mixed colors on the market)
  • Vallejo Glaze Medium
  • Secret Weapon Cool Grey Wash
  • Off-White paint (for bird poop)
  • Black or VERY Dark Brown paint (for engraving text)
  • Colors for the plinth (I use Pewter Grey and Pure White)
  • Brushes (one for detail painting, one for washing, one for drybrushing)
  • Sponge


1. Prime your model black. Be sure to cover the model completely. All bronze statues have a black base color, so any bare metal or plastic will stick out if missed.


2. Heavily drybrush your dark Bronze color, covering all raised areas equally. It's OK to leave deep recesses a black color, for the reason I mentioned above.

3. Using your lighter Bronze color, lightly dryrush the higher areas and edges. It seems redundant but it will show through slightly, even with fairly heavy weathering.


4. Mix together your verdigris color and some of the glaze medium and cover the entire statue using the wash brush. You can vary the amount of weathering by varying the wetness of your brush - if the brush is fairly dry, weathering will be heavy; if it's wet, weathering will be lighter. Focus more weathering on the upper surfaces than lower, as rain causes more oxidation on upper surfaces.

5. Once the verdigris is thoroughly dry, wash the entire statue with SW Cool Grey Wash. 


6. While the wash dries, paint your plinth. Cover the entire plinth in your base color.

7. Using the sponge, stipple successively lighter shades unto the plinth. This is a quick and easy way to fool the viewer's eye into thinking its a stone effect. When finished, use a detail brush to highlight the edges with pure white.

*8. For a more heavy weathering effect, apply a second coat of verdigris glaze, applying it solely on upper surfaces. You can simulate drip stains by using the detail brush and applying the verdigris in vertical strokes, applying heavy pressure at the top of the "drip" and lightening the pressure towards the bottom "end".

*9. To simulate engraved text, apply horizontal squiggles of black paint for the text shadow. For the text highlight, apply horizontal squiggles of verdigris mixed with white immediately below the text shadow.


*10. To simulate bird (or other xenos avian) poop, dab off-white color in spots on the uppermost surfaces, applying drips in the same way as Step 8. You may add small lines of solid poop in some spots, but do so sparingly. Apply a glaze of off-white around each spot, especially in areas where spots are grouped together.

Saturday, February 24, 2018

Necromunda Freight Hub Board

After about a month's worth of work, here is the completed Freight Hub board. This is (just about) how it will look when it debuts at this years' Adepticon Necromunda events (though I'll likely shift a few of the crate piles into the blank spot in the center right of the first picture). The crate stacks themselves were made using the wooden ones I had done a few years ago as a base, I drybrushed them in tans and bieges to bring out the texture a bit more, and then I glued some Dust Tactics crates and GW Munitorium crates. The walkways are also ones I had painted up several years ago. This is the only section where there's heavy graffiti because the Guilder patrolmen hate heights and are too busy keeping the hub floor secure. Munitorium containers were done just really quickly by priming, then basecoating in Rustoleum Camo Khaki, given number stencils from the old IG transfer sheet, and finally given chipped rust with various shades of red and orange.

And, yes, the train DOES run.


Thursday, February 22, 2018

Necromunda Freight Hub: Freight Train

All aboard! I forgot to share pictures of the completed freight train for the freight hub table. As many of you know, most of my Necromunda terrain was inspired by Ironhands' work and, ever since he posted his excellent converted train, I wanted my own.

This is made (almost) entirely of old O-gauge Lionel cars that I received via Facebook train sale groups or Ebay lots. In addition to gaming, I'm also a model railroad fan, so I've amassed a pretty good selection of O-gauge trains over the years. As more model railroad fans upgrade their tracks to the more realistic tracks with plastic ballast bases, these old 3-rail tracks continue to drop in price, usually about $10-15 for a 6' oval, and the lack of ballast actually makes them fit in better with the futuristic look of science fiction games. To make them look even better, I sprayed them all over with Krylon Rust Red primer and then used sandpaper on the top of the tracks for a worn look (and to provide better electrical contact between the transformer and engine).

I held off doing any type of graffiti on these trains because I wanted this to look like the Guilders put some energy into security and didn't let taggers run amok in the freight yard.


The locomotive itself is a Ready Made Trains' "BEEP" engine, which is a super-deformed version of the eponymous GP-7 locomotive. This is an excellent engine for 28mm gaming because it's less than half the size of most realistically-proportioned O-gauge locomotives without looking diminutive next to the cars themselves. It also has an easily removable body shell that just clips on and off, so it allows you to switch between weathered, painted bodies for gaming and nice bodies for railroading (mine has a spare Chicago and Northwestern body). I painted this body using salt weathering (actually old toothpaste!) and spray paint, with decals from the old Imperial Guard transfer sheet, and weathering done in acrylics.

There was some possibility that RMT would end production last year, but it appears that they are back in business.


This was originally a Lionel gondola car with covered coil hoppers. I had it for years but never used it since I pretty much only run trains and cars consisting of midwestern US lines (it's a model railroad fan thing, you wouldn't understand). I don't use the coil covers since it makes the car look too big and then figures can't be placed inside the car, which provides a great deal of hard cover.

I painted this body using salt weathering (actually old toothpaste!) and spray paint, with decals from some old 1/48 aircraft transfer sheets, and weathering done in acrylics.


This is an old Lionel plastic flat car. This (and the tank car) are SUPER cheap because they're from the late 70s when Lionel switched most of the materials over to plastic to save on production costs. You want to search for "MPC" or "MPC-era" lots on Ebay, as these usually go for ~$3 per car.  I painted this body using Krylon Red primer spray paint, painting the wooden deck in tans and greys, with decals from some old Imperial Guard transfer sheets, and weathering done in acrylics. I added crates from the Munitorium Containers set, leaving just enough room on each side to position 2 figures with partial cover.


Another Lionel MPC "three-dome" tank car. These are actually really rare cars in reality but I love the look of them so much, I have about 4 for my model railroad. Since they were rare, they actually look much better in fictional settings. This one actually came to me missing the hatches (really common because they're just separate plastic pieces that weren't glued in well during production), so I made new ones using 25mm washes, 20mm washes, and plastic hex nut covers from IKEA. I painted this body using Krylon Red primer spray paint, with decals from some old 1/48 aircraft transfer sheets and old Imperial Guard transfer sheets, and weathering done in acrylics.


Monday, February 12, 2018

Necromunda Freight Hub - Container Loader

In the process of building a Freight Hub table for Necromunda, I realized that - while I have a lot of Munitorium Containers - I don't have anything to load or unload them. Not wanting to spend $50 on a GW loader, I hit up some of the old toys my son used to play with. This is a plastic Erector-style building set where you can build a couple different construction vehicles. I think it's called Caterpillar Max Builder or something like that. Mostly this is straight out of the box with the addition of a skull crane and stack from the Sector Mechanicus kit and a Land Raider engine, as well as some granny grating to cover some of the windows and vehicle walkway. Though a little large, this does work well as a piece of terrain.

As for painting, this won't win any awards. I did the priming and yellow undercoat with spray paints and weathered with acrylics. 


Saturday, January 6, 2018

Ork Shantytown: Completed Shanties

In addition to the alien foliage I completed back in November, I also finished up these Orky shanties for the Ork Shantytown table for Adepticon 2018. Many of you would ask - "how do Orks get into the Hive?" - and the answer would be doz sneakee Kommando gitz who need a base of Orkerations. They're Boyz N Da Hive.

Like the foliage, these are all based on old CDs, consisting of poster foamboard and cardboard superstructures wrapped in cereal box cardboard "skrap armor" panels. The metal roofs are corrugated cardboard (the smallest corrugation, called "E type") and the platform roofs are thick plasticard. The doors, windows, and glyphs are all resin casts, made from masters that I assembled with plasticard. Random other gubbinz are sourced from a variety of different plastic models including a Space Marine missile rack, Tau railgun, 1/56 scale panzer turret, Dust tactics figure base, and Syberclicks tanks.

These are painted using a variety of craft paints - some brushed on and some airbrushed on. The "dusty" weathering effect on horizontal surfaces was achieved by "scrubbing" the surface with a very drybrush of the base colors. Rusty and metallic chipping was achieved with a sponge. Weathering was done using Vallejo European Dirt wash, which does a good job of providing a quick and dirty look, while also toning down the very bright colors.


Monday, January 1, 2018

New Year, New Necromunda

Happy New Year, everyone! I hope your 2017 was a good one and, even if it wasn't, here's to hoping your 2018 is even better. And with that new year comes a new Necromunda (if you missed it, I shared my initial thoughts upon its release here) as well as new Necromunda events for Adepticon 2018. To do so, I've enlisted the help of two veteran players to assist me - Dan and Duane - and we are enormously excited. Registration went live in November and we sold out nearly all the events within the first week! Since that time, we've been bouncing ideas back and forth and recently released the preliminary event rules to the Adepticon page linked below:

http://www.adepticon.org/event-rules/


With that out of the way, I would like to quickly go over the general rules. Note that the Friendly is simply an event played for fun. It will be your chance to try out the new ruleset before competitive play, get in a few pickup games, and meet (and play!) the organizers.

The Underhive events will utilize the main tiles from the boxed game and will require the least amount of experience to play (though veterans are of course always welcome). The Gang War and By Night events will utilize fully 3D boards on 4'x4' tables and will require a basic amount of experience with the ruleset and play format.

For each event, players are given a total of 1250 credits to spend on gang creation utilizing campaign gang creation rules from the Gang War expansion(s) and the Legacy Gangs PDF. Gangs start with 5 Rep, each Leader receives a free skill, and access to Trading Post items is immediate. Hired Guns are limited to a maximum of 2 per gang (with an extra hire fee) and do not count towards the minimum number of fighters. This is done for several reasons - to give players access to better gear for the event, to widen the use of miniatures that are modeled with different weapons than those initially available, and to speed up the post-game sequence. Note that all models must be assembled, painted to a tabletop standard, and reasonably adhere to WYSIWYG (with the exception of pistols, grenades, and wargear). After all, tabletop gaming is a visual spectacle and there's no better way to get immersed in it than with fully-painted miniatures and terrain. A very important change this year is each model must have a mark on their base denoting the facing of that model for placement of the firing arc template.

Tactics cards will be regulated to generic tactics only, as many Legacy Gangs do not yet have gang-specific Tactics cards available. Additional Tactics may be included with the scenario pack, but don't bet on it. The "Street Cred" bonus objectives do reappear this year with some minor revisions, re-named to "Hive Cred".

Scenarios will have a hard time limit of 65 minutes, with 15 minutes for the post-game sequence. To make the post-game sequence quicker, gangs will not have access to turf, territories, recruitment, or the Trading Post. As such, the "Being Captured" section is disregarded but experience, injuries, and advancements function as normal. More importantly, ALL gangs have access to the Medical Escort rule from Gang War available FOR FREE, so long as there is at least one uninjured fighter in the gang. We found in past events that the loss of important fighters early on in the event could be catastrophic to the player's chances, so this gives them a second chance.

Now work begins on getting the scenarios themselves fleshed out and working on getting terrain in order....

Sunday, November 12, 2017

Necromunda: Underhive and Gang War Initial Thoughts

I had a chance today to sit down with both the copies of the new Necromunda Underhive boxed game and the Gang War expansion book and wanted to give my initial thoughts on both. As such, this shouldn't be taken as a true review, nor as a simple unboxing, but more as an attempt to provide my own feedback with my own background.

For those of you who are unfamiliar, I have a long and varied history with Necromunda. Way back in 1995, when I was 16, Necromunda was the very first miniatures game I had ever bought. I played it nearly every other day that year and pulled it out often during high school. When my now-wife and I moved to Chicago in the early 2000s, there were essentially no gaming stores in business within city limits in which to play, so I formed a small group of players. By 2008, I had been introduced to the Adepticon gaming convention and volunteered to run a Necromunda tournament that became an annual tradition and was, as far as I know, the only competitive Necromunda event in the world (at least during that time). Shortly thereafter, I sat down and wrote the expanded ruleset known as Inquisimunda - an expansion still played, even after my involvement in the project waned and I had stepped away; version 2 being due to the efforts of many wonderful volunteers. With the new release and my prior experience, I've been tapped to lead the Necromunda team at Adepticon. So, you can say I'm fairly knowledgeable on the subject....

Underhive Boxed Game


With that said, these are my initial impressions done by taking about an hour to flip through the book and recall previous versions, so there may be some minor errors. Measurements are approximate since I didn't have a ruler. The boxed game itself is simply jammed pack with lots of GW goodness. The templates are of similar size as those used previously - a flamer template, 3" blast and 5" blast. Terrain includes 10 2"x2" barricades, ~5 Loot Caskets, a "Beast Lair" marker, Priority marker, 4 computer terminals, and a small Imperial shrine (which, intriguingly, has no rules....perhaps a Redemptionist objective in the future???). Terrain also includes 5 large 4"x2" doors and 2 1.5"x2" small doors that are only used in the "board" style game.

The miniatures themselves are definitely larger than the old ones but probably not "true" 32mm. The most noticeable difference would be in the Eschers; Goliaths could easily mix old and new miniatures. There is a lot of interchangeability with heads and hair, but probably not quite as much with arms. Interestingly enough, each gang has a different base size (Eschers 25mm, Goliaths 32mm), which means that Goliaths will have a wider area of effect but will also likely suffer more from templates and Broken results. The Escher models in the box tend to favor las and autogun weaponry, while the Goliaths tend to favor stub and shotgun weaponry.

There are 10 named Goliath cards, 10 named Escher cards, and ~20 blank generic fighter cards. I am unaware of any plastic sleeves on the market that would adequately fit their larger size, but it will only be a matter of time before someone releases them (or they could be laminated). The named Goliaths tend to be slower but stronger and with heavier armor; whereas the named Escher tend to be faster and more nimble but with weaker armor. Terrain tiles are about 12" square with 1.5" squares to denote tunnels and passageways.

One of the new features are the addition of "Tactics" cards which are similar to those used in 8th ed. 40K. Each gang has 4 unique Tactics cards and there are 20 generic Tactics cards. Goliath Tactics are shrug off injuries, increase charge distance, increase Strength and Toughness, and stand up Pinned models. Escher Tactics are counter a charge, force an opponent to Nerve test before battle, set a gas trap, or move their models before battle. Generic Tactics include (but are not limited to) extra armor, bobby traps, hidden passages, and multiple activations.

The main rulebook is fairly nice. If I have one criticism of it, I'd say the old rulebooks have much more artwork and more in-game pictures, which tended to add inspiration for new players to get their miniatures and terrain assembled and painted. The first ~35 pages of the book are devoted solely to fluff and immersing the player into the world of Necromunda. If you are familiar with the old rules, there really isn't much new info here.

Fighter characteristics and loadouts are fairly similar to previous editions, with some new characteristics (Cool, Willpower, and Intelligence). Each turn players roll for Priority and place their Readied markers and are then able to activate each fighter and that fighter gets ~2 actions. Actions include basic move, basic shoot, aiming (+1 to hit), charging (+D3" to Move - HUGE change from previous editions!), take cover (move up to 1/2 move then go to Pinned), Coup De Grace (basically eliminate an injured fighter not engaged in HtH combat that's within 1"; this is a free action if injured in HtH combat as with previous editions), reloading (basically roll to make a weapon usable after a failed Ammo roll), open or close a door, use a terminal, break down a door, crawl/fire through a duct, and open/lockpick/carry a Loot Casket.

Fighters in HtH combat have two basic actions - fight or retreat. Pinned fighters may stand (recover from Pinning), crawl (1/2 move), blind fire (shooting attack, -2 to hit), and reload. Injured fighters may only crawl.

Shooting and HtH mechanics are similar to previous editions, with the addition of a "prone" stance to shooting that confers a -1 to hit modifier at long range. There is a 90 degree vision arc, so models in competitive environments will absolutely need to have a tick mark on their bases to denote facing. Fighters may fire two pistol weapons at the same target with one action with a -1 to hit modifier. The Stray Shot rules do remain. And yes, Overwatch is "gone", having been changed to a skill (more on skills in the Gang War section). Multiple HtH combats are handled as each fighter either adding or subtracting 1 to the fight result.

To wound, gone are the calculation tables comparing Strength and Toughness on X and Y axis. Instead, it is a simple chart - twice the Strength to Toughness? 2+. Strength Greater than Toughness? 3+, etc. Injury results are the same, with the term "Seriously Injured" replacing Down. Nerve Tests for fighters are taken if a friendly model goes OOA or is Seriously Injured within 3" - test using the Cool characteristic, adding 1 for each other friendly fighter nearby. If failed, the fighter runs away to cover and is Broken. Broken fighters continue to run if there are enemies in LOS, are never Readied, may Rally in the End phase, and while Broken only react to HtH combat attacks.

Unto basic terrain rules - Doors block LOS and movement (when closed), have T 5 and 4 Wounds. Barricades provide -1 to hit modifier in Shooting and HtH combat. The "Beast Lair" marker is very cool - if a fighter ends their activation within 6" there is a chance they're attacked with a VERY tough attack (I won't ruin how brutal it is here! Mwahahaha...) and has T4, 3 Wounds, and is -2 to hit! Ducts act as walls and pitfalls require Initiative checks if a character is pushed into them or they go Out of Action. Toxic Sludge pools make fighters -1T if they stand within them and can cause them to go Out of Action is they are knocked down into them. Loot Caskets have the possibility to be a trap, nothing at all, or ammo.

Gang War


Hmmmm....it's tough to say how I feel about this expansion. They've done a nice job of streamlining some of the more "advanced" rules here, but there are also some really glaring omissions. The main "board" game style is referred to as Zone Mortalis and seems to line up with (admittedly what little I know of) Zone Mortalis itself. The "3D" or "Classic" style is referred to here as Sector Mechanicus. I'm not sure how much traction the community at large will give these easily trademarked names but....time will tell.

As for the 3D rules themselves, there really isn't a whole lot here, with the rules only taking up about 8 pages. Terrain is either an obstacle (anything smaller than 2"x2"x2") or a Structure. True LOS is covered, terrain is catalogued as either normal (full move) or difficult (1/2 move) terrain, platforms and overhangs are covered as well (basically, if a figure can fit, they can move there). Climbing without the aid of a ladder is done at 1/2 movement; climbing with a ladder is done at full movement and the time-honored tradition of "running" up a ladder is omitted (that's definitely going to be house ruled by veterans). Jumping, leaping, and falling are treated in similar ways to previous editions. Doors are omitted here (unless of course, like me, your terrain has doors, in which case you're free to use the Door rules). And.....that's about it.

Next are the campaign rules. The biggest change here is to the Experience and advancement rules. Experience is given (for now) only by taking another fighter Out of Action, which earns +1XP. Everyone but basic Gangers are given the chance to "purchase" advancements at a set rate. Every subsequent time that advancement is purchased, it's cost increases by +2XP. Basic Gangers must "pool" their first 6XP, at which point they roll 2D6 and take a one-time advancement (unless they are promoted to Specialist by rolling a 2 or 12). I'm unsure how I feel about this - while it certainly speeds up the post-game sequence, it feels too much like Mordheim, in which your basic fighters were pretty much meat shields for the Heroes. Only lists for House Escher and House Goliath are included in this supplement (these lists replace those in the boxed game rulebook).

With that said, GW have also left out an "Underdog" Table. For those of you who don't know, this table was the difference in points between each players gang rating that would add additional experience to the "weaker" gang in the post-game sequence depending on how much of a difference there was. This helped to balance out play between older and newer gangs and gave players entering campaigns at later points a slight boost to keep them competitive. EDIT: There IS a function similar to the table in the pre-game (in which the "weaker" gang gets an extra Tactics card) sequence, but I don't feel this is as good of a balancing function, in and of itself.

The injury list is similar, including the much-hated Death result and Captured result. The territory list is similar (if not exactly the same), as are the Skill tables and much of the Trading Post. Included at the very end of the book are six Scenarios, of which I think Border Dispute is probably the only truly "new" scenario.

The biggest omission here, and I think my main issue with this book, is the lack of Hired Guns. Hired Guns were probably the best thing about previous editions, as they added a bit of flavor and the ability to balance out a gang that may be lacking in an area of expertise. Hired Guns like the Scum, Ratskin Scout, Pit Slave, and Wyrd are absolutely iconic miniatures from GW's 1990s lineup and their absence is glaring here. In their absence, I think GW should have included something extra to balance it out, perhaps something like some exclusive Tactics Cards. EDIT: Forgeworld is releasing a named Imperial Beastman Hired Gun and has plans to release more. However, I feel this is a bad idea for two reasons. First, while named characters are fun (Mad Donna Ulanti, anyone?), the big appeal of generic Hired Guns was the nearly limitless modeling potential, giving these products a broader appeal among the community. Second, with rules being included with the miniature, this lowers the visibility of these to potential customers but most importantly, to an event organizer like myself. TOs and Judges shouldn't have to buy multiple miniatures to understand how they work in-game and to decide whether or not to include them in an event. GW would be best served by releasing a compilation of Hired Guns, named characters, and creatures in a single book format, much like Outlanders.


In conclusion, this is an almost perfect re-release of a beloved miniatures game and I really hope that GW is willing to listen to feedback from the community and expand upon this initial release to bring it more in line with the vast array of gangs, miniatures, and fluff from previous editions.


Wednesday, April 12, 2017

Adepticon 2017 - Necromunda and Inquisimunda Recap

Since I've been back from Adepticon, I've been taking a short break from posting and modeling and working on some real life projects that got put on hold for the convention. Now, that I'm done, I'm finally putting up some pics from the inaugural Inquisimunda and annual Necromunda tournaments. Unfortunately, MANY photos did not turn out due to the consistently poor lighting in the banquet rooms. It's a constant point of contention that may see me resorting to bringing a full camera rig and lighting setup next year. As cool as these pics are, there are a lot of awesome warband/gang pictures that didn't come out.

If you played in the events and a picture of your work isn't posted, I apologize. However, if you have any pictures you would like to share and have posted here, please drop me a PM on Facebook or send me an email. You will be given credit and my thanks.

I had the most skepticism about how the Inquisimunda event would run but, oddly, we had more issues during the Necromunda event (which both started late, ran over time, and had a drop). Additionally, I lost half a crate of terrain (which included my awesome Collapsed Dome Walls) so we were down a table. Thankfully, the guys who run Open Gaming were gracious enough to loan me TWO tables worth of terrain!

Even with the setbacks, I think players had a good time and it was a nice change of pace for me as an organizer. Additionally, I've had a lot of questions about running other systems this year and, at this point, it's rather too early for me to decide what will happen at Adepticon 2018. If my math is correct, next year would mark 10 straight years of me running Necromunda which, as much as I enjoy the system and the players can be rough. Shadow War has (slightly) changed my outlook on GW as well. We'll see what the future holds but I should have a concrete explanation of what events I'll run this August.


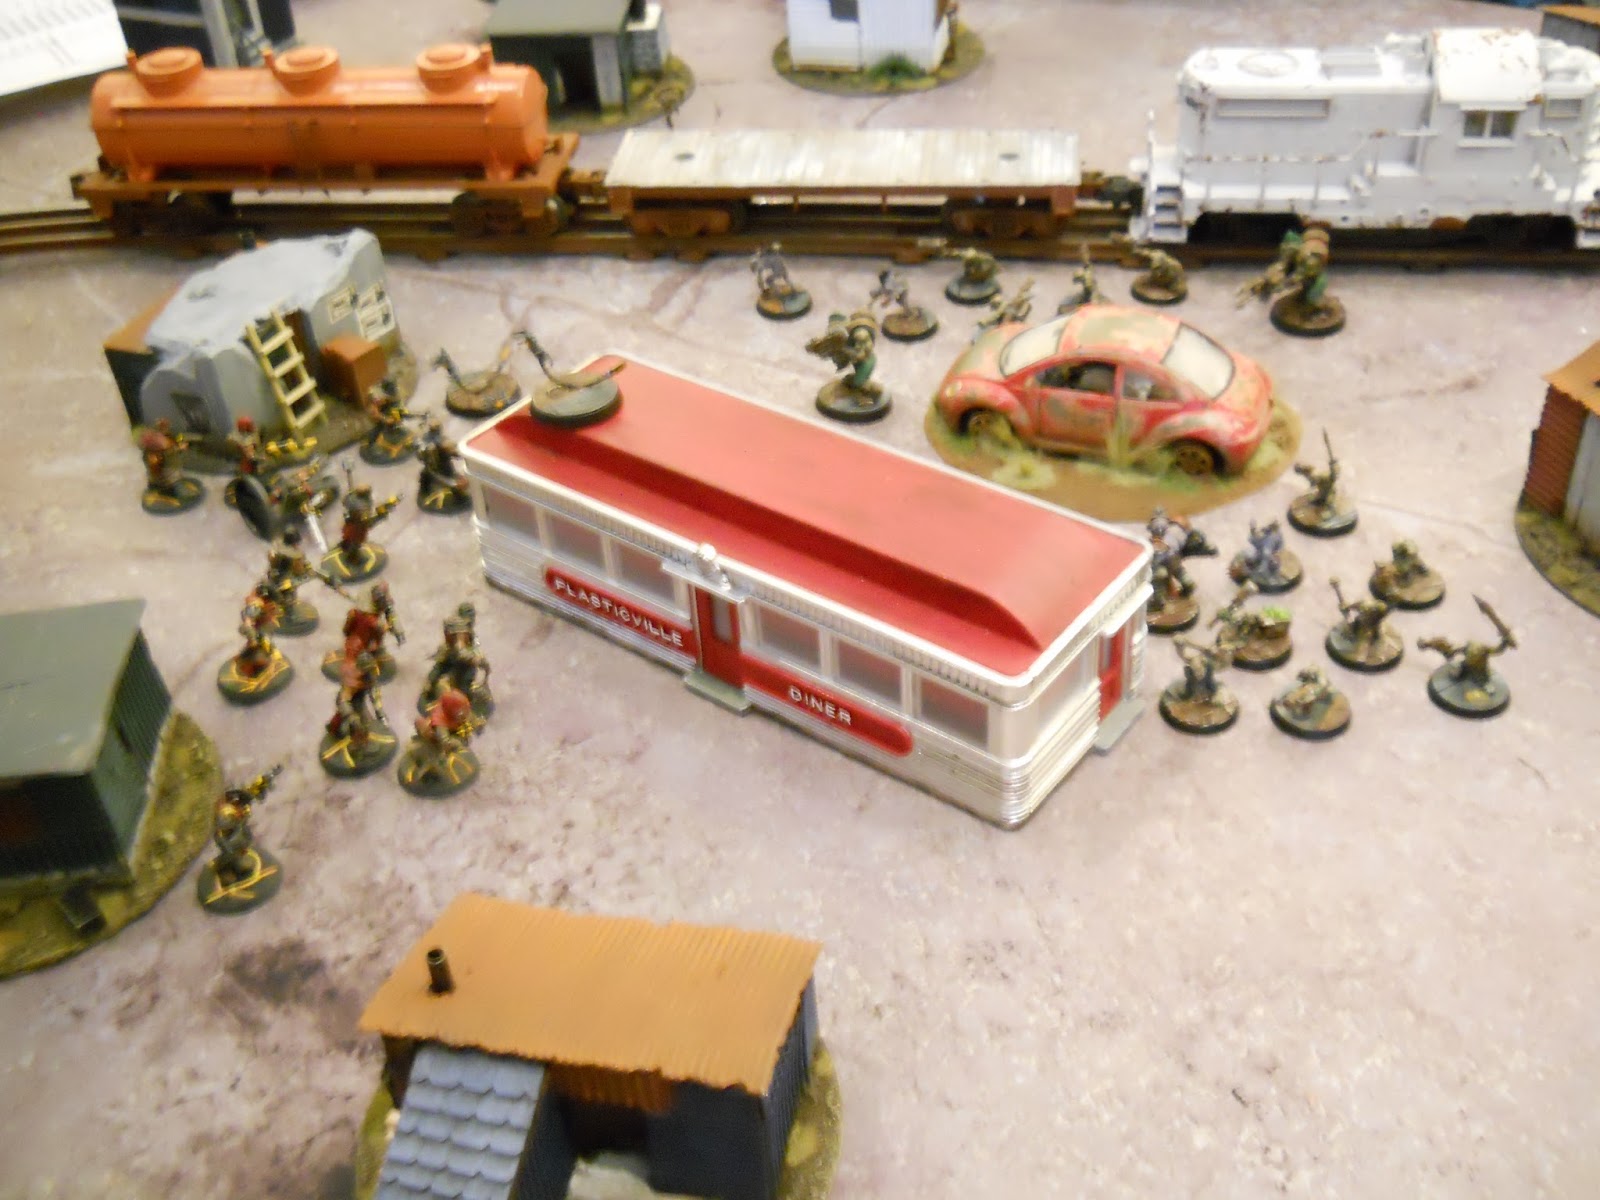
These are pics of the small Inquisimunda game the guys over at ExProfundis played that night. As I was running Necromunda, I couldn't get many pictures (or play, which is really what I wanted to do) but this was a truly amazing board with some awesome miniatures on it. Really inspirational.