
In the increasingly urbanized conflicts that the enveloped the world after World War 1, troops often found themselves with little to no cover or concealment in the broad thoroughfares, plazas, and parks that had come to dominate the civil planning of cities after the crowded conditions of medieval Europe. In response, many assembled and scrounged whatever they could to provide protection against enemy fire and prevent enemy troops from maneuvering quickly in the form of barricades. In this tutorial, I'll show you how to easily assemble three common barricade types. But first, let's take a look at some historical inspiration...


Materials
- 2-3mm MDF
- 1/2" to 2" thick Foamboard
- Balsa, Basswood or other scale lumber in planks, square, and round
- Pre-mixed vinyl spackle
- Sand, gravel, and assorted rubble
- 1/48 and/or 1/56 scale bricks (I prefer Pegasus Hobbies' small red brick)
- Paints (black, greys, and browns are prevalent with reds, red-brown, tans, and yellow being less so)
- Dry pigments (optional)
- Glaze or pigment medium (optional)
- Greenstuff (optional)
- Craft wood shapes (small pickle barrels, circles, etc. - optional)
- Old or broken 1/48 or 1/56 softskin vehicles, civilian vehicles, farm/construction implement (Lledo, DeAgostini, and Ertl "Vintage Vehicles" work well)
- Bits and gubbinz (optional)
Rubble Pile Barricades
One form of barricade was a simple breastwork, formed by pushing or dumping large quantities of rubble into a slope, backed with lumber boards. In heavily-bombed cities, this barricade was fairly easy to assemble, but was non-existent in cities that had not suffered bombing or shelling.
One form of barricade was a simple breastwork, formed by pushing or dumping large quantities of rubble into a slope, backed with lumber boards. In heavily-bombed cities, this barricade was fairly easy to assemble, but was non-existent in cities that had not suffered bombing or shelling.
1. Cut a rectangular piece of MDF measuring 6" x 1.5". Along ONE of the long edges, bevel with a dremel or piece of sandpaper (be sure to wear a dust mask or respirator).
2. Cut a piece of 1/2" or 3/4" insulation board measuring 6" x (a bit under) 1.5". Using a utility knife, carefully cut the board lengthwise at a 45 degree angle, so you're left with two sloping pieces.
3. Glue the sloped board on to the MDF with the slope facing the beveled edge (see below), weigh it down, and let dry thoroughly . You may need to clean the board up slightly so the transition between MDF and insulation isn't too apparent. It's OK if there's a slight difference, as this will be covered in rubble, but the pieces should be mostly flush.
2. Cut a piece of 1/2" or 3/4" insulation board measuring 6" x (a bit under) 1.5". Using a utility knife, carefully cut the board lengthwise at a 45 degree angle, so you're left with two sloping pieces.
3. Glue the sloped board on to the MDF with the slope facing the beveled edge (see below), weigh it down, and let dry thoroughly . You may need to clean the board up slightly so the transition between MDF and insulation isn't too apparent. It's OK if there's a slight difference, as this will be covered in rubble, but the pieces should be mostly flush.

4. Measure out and cut enough wood strips to cover the back and sides of the barricade (see below). The sides can stick out slightly towards the top.

5. Add some thicker strips of wood vertically at the corners and halfway along each edge to represent supports

6. To prevent vehicles and tanks from simply driving over the slope, workers would take railroad ties or thick wooden beams and jam them into the rubble, jutting out at angles and reinforced by the weight of the rubble on top of them. To represent this, cut or break off 1-2" long pieces of thick wood rod (either square or rectangular, I used 1/2" x 1/4" inch basswood), sharpen one end, put a small dab of glue on the point, and shove it into the foamboard at odd angles. Don't overdo it - the beams and ties were heavy and it would have been time-consuming to place many on each barricade.

7. Cover the slope with a mixture of 50% spackle/25% glue/25% paint and sprinkle your rubble mixture on. Be sure to include bricks if you have them. Allow to dry thoroughly (at least overnight is best).
8. Once dry, simply paint the rubble itself. The wood can be stained with washes or diluted paint.
Rubble "Cribs"
Another form of barricade was the "crib" or box. This was used heavily by the Germans after mid-1944. It required a lot of manpower, time, and materials to construct, so - as far as I can tell - doesn't seemed to have been used outside of Germany itself.
1. Cut a rectangular piece of MDF measuring 6" x 1.5"

2. Cut a rectangular piece of 2" foamboard with enough space to accommodate the dowels, this is going to require some math. For my cribs, I used 1/4" square wooden dowels which seemed to be about the right size for 28mm. Since I needed to place pieces of dowels on either side, that would mean I had to subtract 1/2" from both sides (0.25 x 2 = 0.50), so my foamboard measured 5.5" x 1". Glue the foamboard to the base, weigh it down, and let dry thoroughly.

3. Measure out and cut enough pieces of wooden dowel to form the walls of the crib. As the pieces are stacking in alternating rows (remember building with Lincoln Logs as kid?), you will need some pieces measuring the full length and width of the base itself, and some measuring the length and width of the foamboard. Before gluing it down, be sure to dry fit the pieces to ensure they look right - it's okay if some pieces are slightly too long or too short, these barricades were assembled in haste! You can also make them any height you wish - there are some pictures showing cribs that were used as breastworks and many more showing cribs taller than the height of a grown man.
Once you have decided on the height of your cribs, make the top of the wood with a pencil and then use a utility knife to cut the foamboard BELOW this line, with a sloped towards the edges. Glue on the wooden dowels and allow to dry.
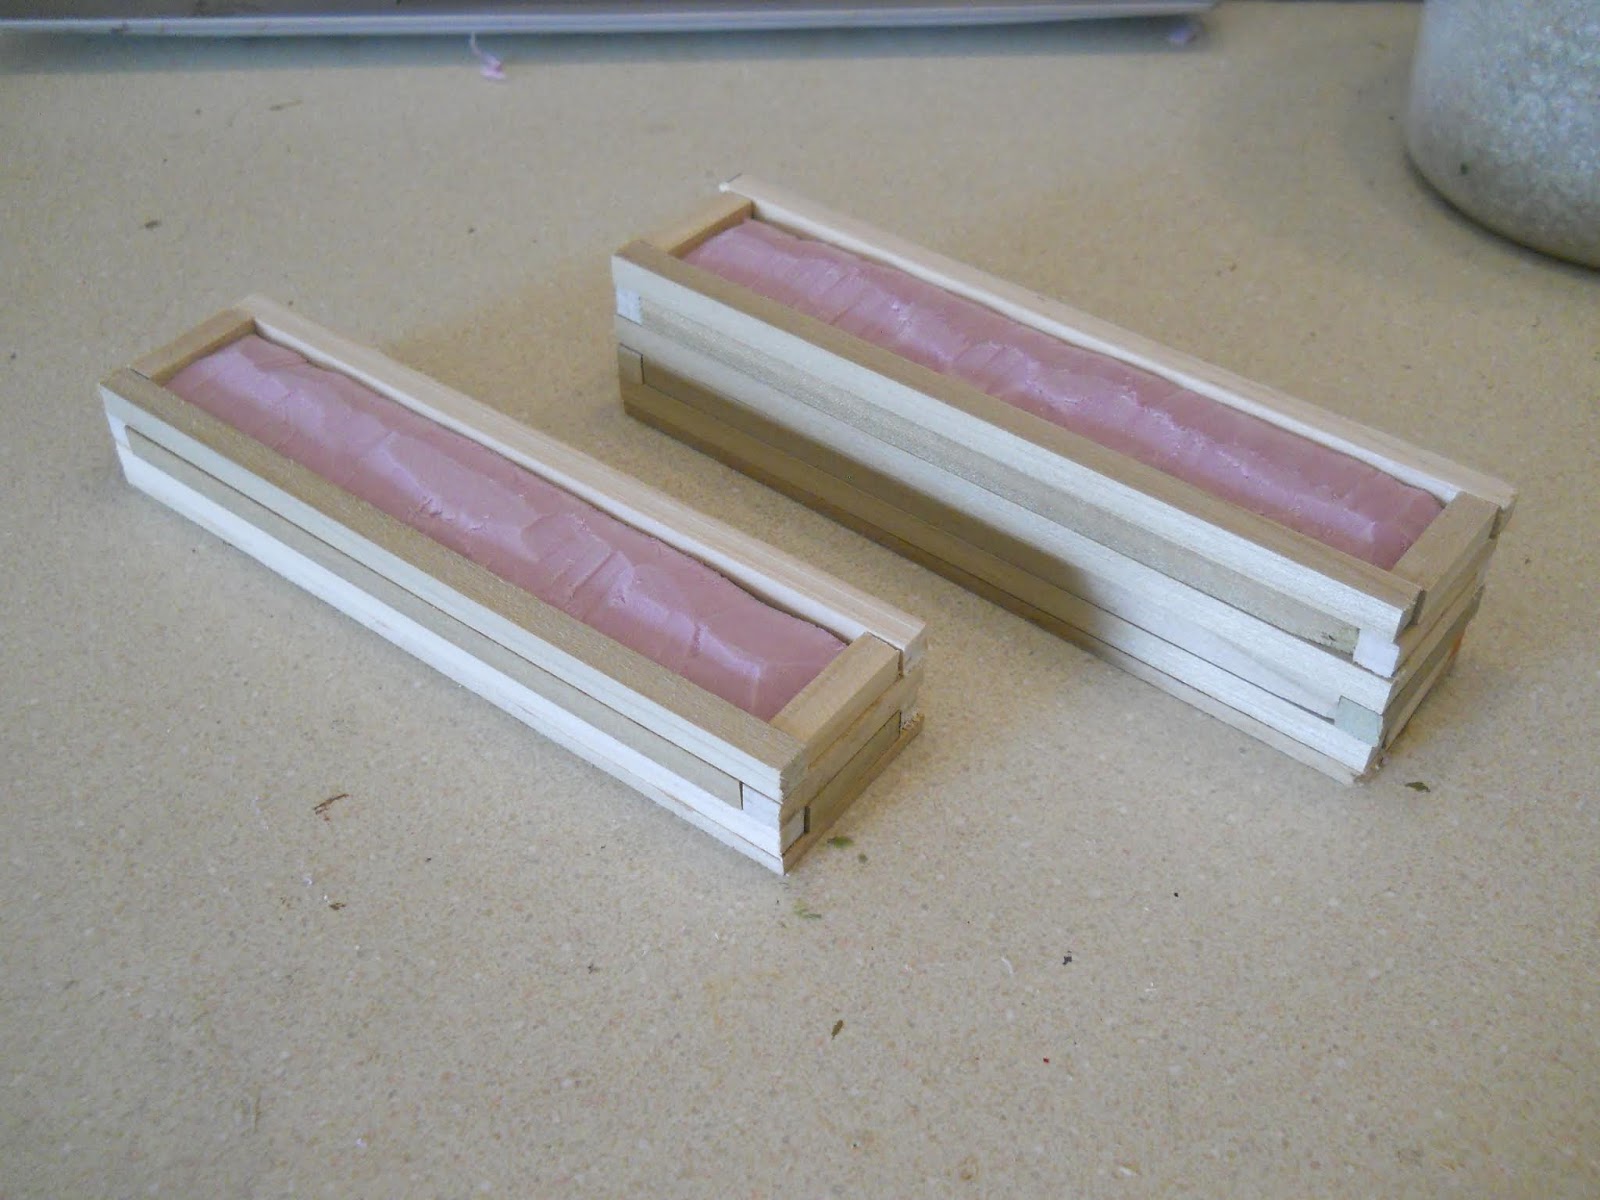
4. Once dry, cover the slope with a mixture of 50% spackle/25% glue/25% paint and sprinkle your rubble mixture on. Be sure to include bricks if you have them. Allow to dry thoroughly (at least overnight is best).
5. Once dry, simply paint the rubble itself. The wood can be stained with washes or diluted paint.

Bric-A-Brac or "Random Crap" Barricades
The most numerous example of urban barricades were those assembled from random items, including things such as streetcars and vehicles filled with rubble, paving stones, cable reels, rolls of newsprint, furniture, barrels, crates, sandbags....if it was large enough to provide some measure of cover and concealment, it's likely to have been thrown into a barricade at some point. Barricades like this pre-date the 20th century as well, being widely used during the French Revolution and (most famously) at the Battle of Rorke's Drift. By WW2 though, they needed to be able to withstand heavy caliber ammunition and tracked vehicles so, when lighter items were used, they were often filled with rubble, bricks, and stone and reinforced by placing heavy timbers or railroad ties into the ground behind them.
I could easily write instructions on how to precisely make a random barricade, but most of the fun is finding examples and assembling them yourself. Below are four of my completed barricades (as well as those listed above). As you can see, I used some old broken vehicles, some "pickle barrel" wooden shapes, 1/48 fuel drums, lasercut MDF squares (leftovers from some Sarissa buildings), bricks, etc.
Sandbags can be easily made by rolling out strips of epoxy putty, cutting them into equal pieces, and squashing them down in ordered rows. Cable reels can be made using a piece of circular wooden dowel as the center with two circular MDF bases sandwiched on either side. If you break, incorrectly assemble, or badly paint a vehicle, this is the perfect excuse to use it - just be sure to fill soft-skinned or civilian vehicles with rubble.
Whatever you do, just be sure your figures can see over the barricade in most places!
Sandbags can be easily made by rolling out strips of epoxy putty, cutting them into equal pieces, and squashing them down in ordered rows. Cable reels can be made using a piece of circular wooden dowel as the center with two circular MDF bases sandwiched on either side. If you break, incorrectly assemble, or badly paint a vehicle, this is the perfect excuse to use it - just be sure to fill soft-skinned or civilian vehicles with rubble.
Whatever you do, just be sure your figures can see over the barricade in most places!


