
I always like to reduce the waste that comes from modeling (EDIT: Okay, so you don't really "save" anything except some cash) and building and looking at all the leftover StuG F/8 hulls from 2 boxes worth of PSC StuGs gave me an idea. I had an extra Zvezda StuG B kit and thought..."is there an easy way to combine these two kits?". Well, the answer is you can indeed combine them to turn your unused PSC hulls into more minis, but it takes a little work. Here's what you'll need to do.
Tools:
- X-acto knife and a good sharp blade
- Sanding stick or jeweler's file
- Drafting triangle
- Plastic glue
Supplies:
- Leftover PSC StuG upper hull pieces and gun
- Zvezda StuG B sprue
- Rectangular plasticard rod
- .10mm thick Plasticard sheet

Step 1: Assemble the chassis of the Zvezda StuG B, leaving off the tracks.
Step 2: Flip over the PSC hull piece and cut off the raised edges that run parallel to the track guards in the front. You'll also have to cut about 1mm off either side of the channel that the glacis armor plate sits in (see Step 6 for clarity).
Step 2a: Cut off the raised edges along the rear of the upper hull. Cut a piece of the rectangular plasticard rod a little smaller than this area and glue down.

Step 3: This is the hard part - you need to sand down the outer edges of the Zvezda chassis, especially at the very front where it angles forward. Dry fit, sand, dry fit, sand, and dry fit some more with the PSC upper hull until you get the correct fitting. Be sure to periodically dry fit the tracks to check there is enough room for them!!! Clip off the front snap-fit pin.
Step 3a: Cut down a piece of rectangular plasticard rod to fit behind the mufflers on the rear of the Zvezda chassis.
Step 4: Glue in any weights into the Zvezda chassis and glue the PSC hull unto the chassis.

Step 5: If you have any leftover, trace the PSC glacis armor plate unto the .10 plasticard sheet. If not, you'll have to dry fit (again!) the plasticard into the channel on the PSC hull and cut from that.
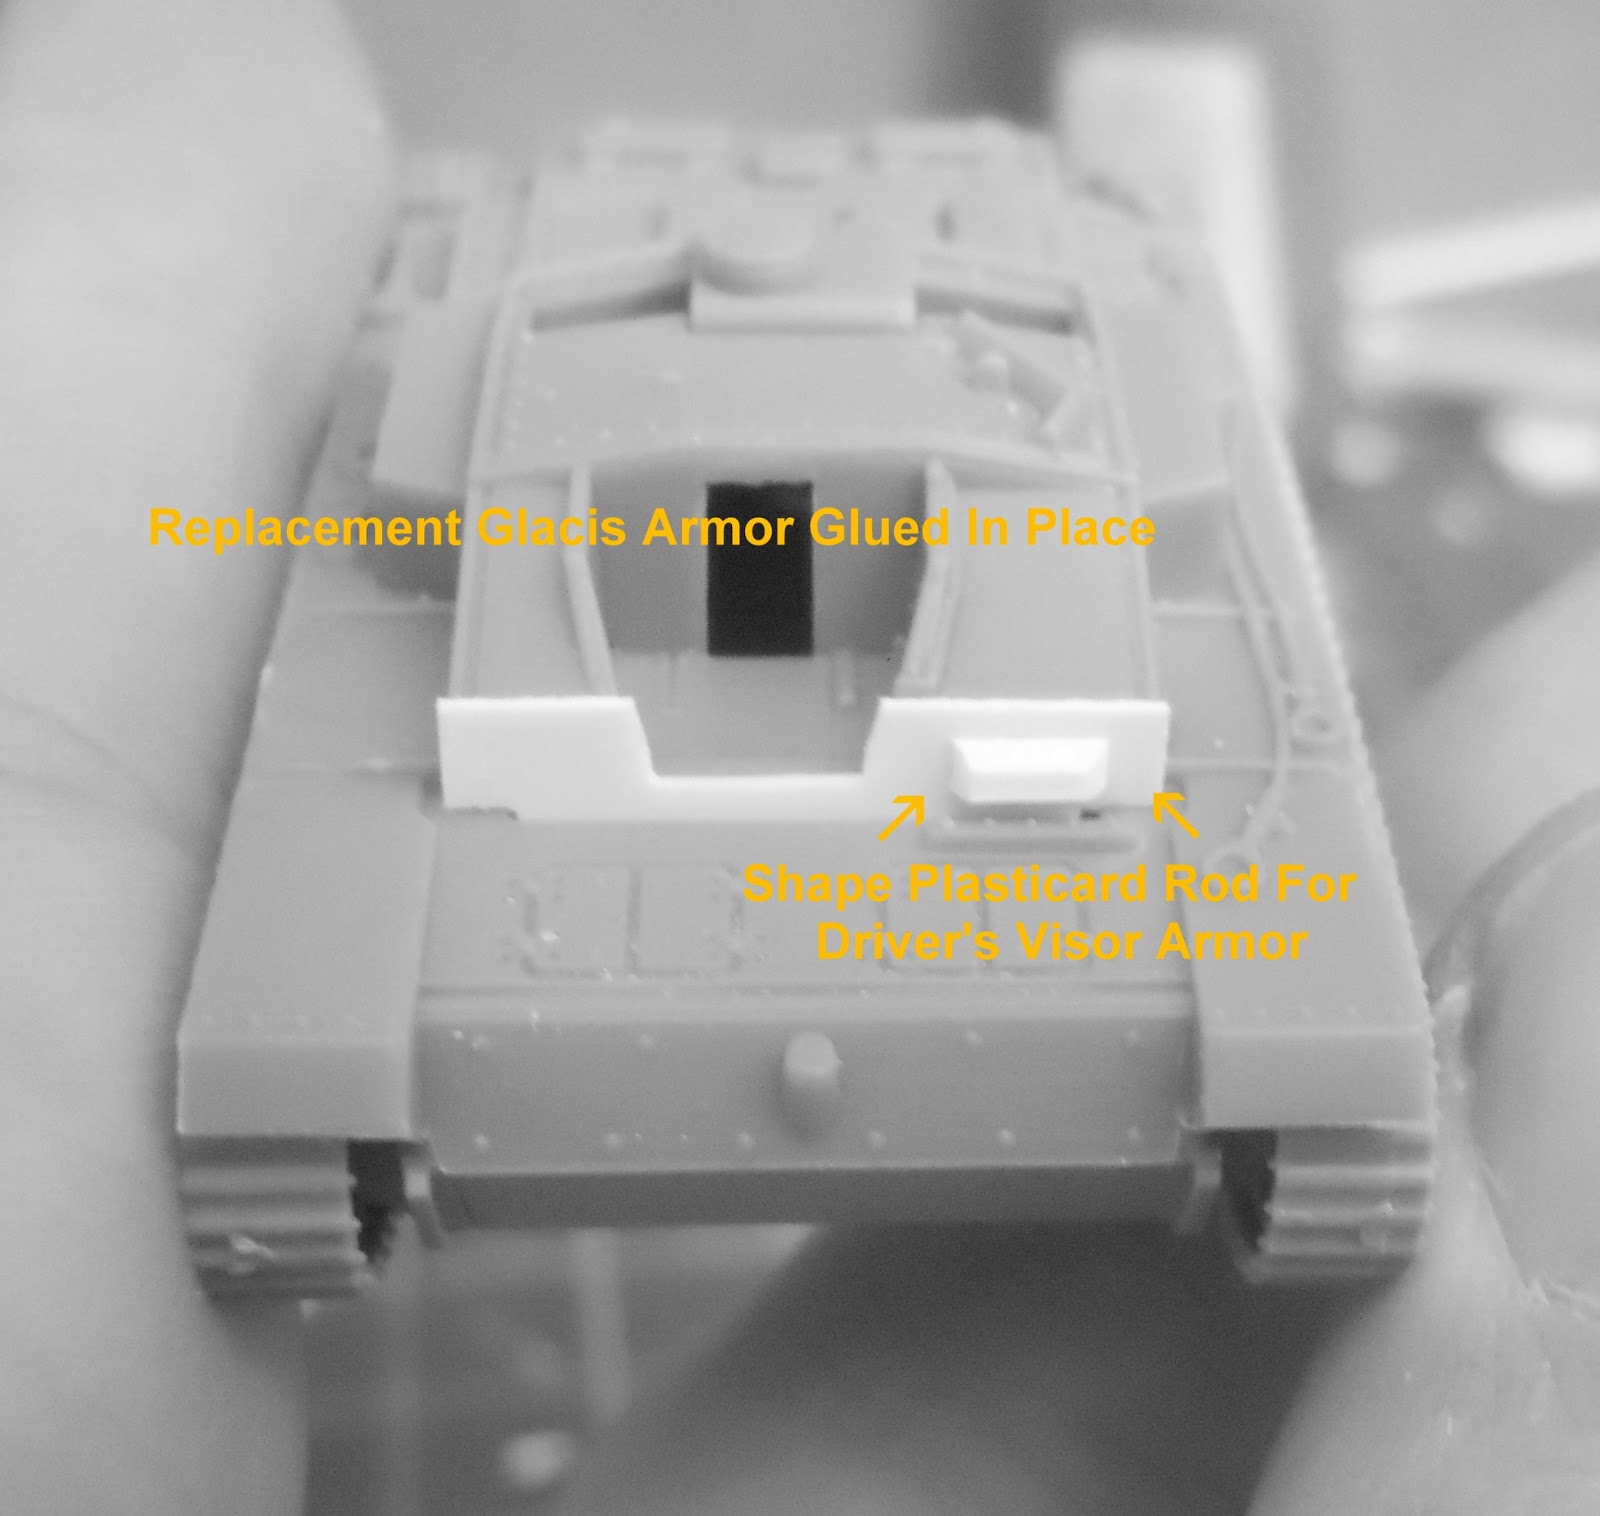
Step 6: Glue down the glacis armor plate as shown above. Shape a small piece of plasticard rod into a small rectangle with 3 beveled edges for the driver's visor. Glue down as shown above.
Step 7: Assembled and glue the main gun. Finished!


No comments:
Post a Comment